The "Poot" TTG Handgun 1 |
||
The gun is 8 inches long, and fairly easy to use. It uses a diaphragm and a tiny bike pump.
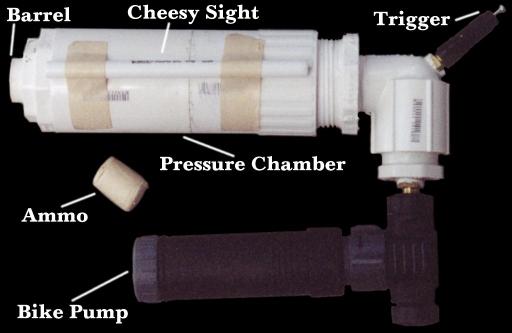
The Trigger |
||
Another alternative to make the gun smaller (and probably more effective) is to place a screw-in cap on the back of the gun instead of an elbow. I used an elbow because it lets me put the pump at a convenient angle, and the trigger in a natural spot. However, you could also screw in a cap which has two tank valves in it, and decrease the size. This would also decrease the volume of the back air chamber, which is a Good Thing(tm).
The Pump |
||
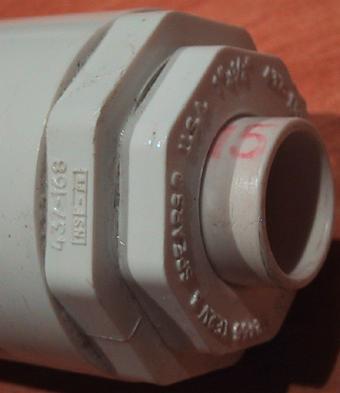
Pictures |
||
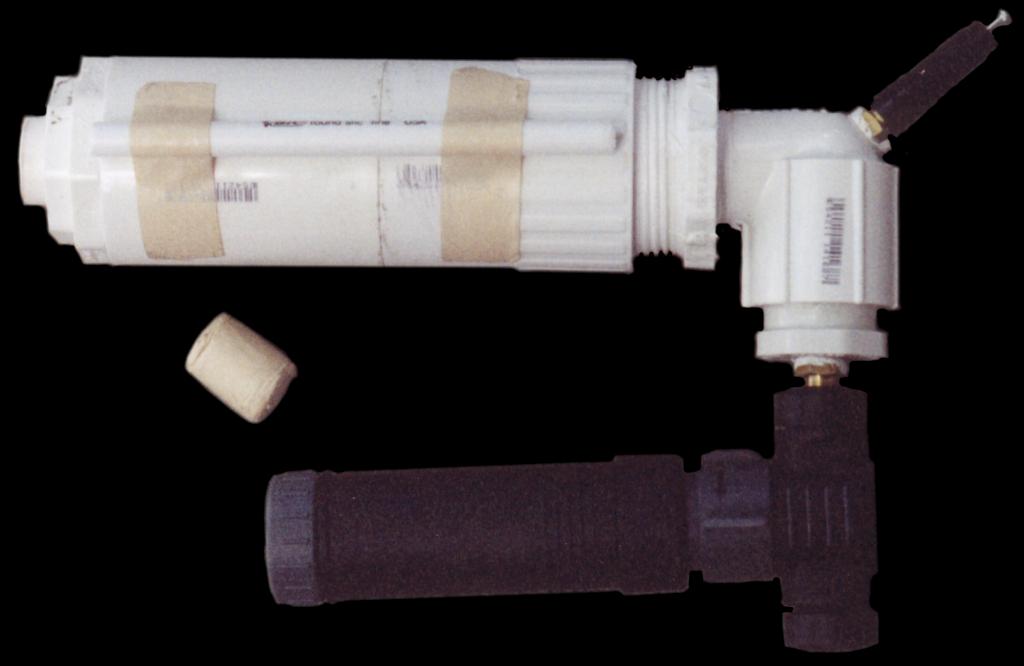 |
The "Poot", without the parts labelled. |
Shopping List |
||
- A foot of 1.25" or 1.5" PVC pipe for the air chamber
- A foot of 1/2" PVC pipe for the barrel
- A smooth pipe <--> pipe connector sized for the air chamber
- Another connector, with threads inside on one end
- PVC size-adapter parts for air chamber -> barrel sizing
- A threaded size adapter from the air chamber to a smaller size
- A small PVC elbow
- A cap to fit in the end of the elbow
- Two tank valves
- One valve extender
- A bike pump. Mine was a Crank Brothers "Power Pump".
- Stiff, flexible rubber sheet for a diaphragm. I used part of a rubber sink stopper.
- PVC pipe glue and cleaner
- Teflon tape for sealing threaded pipes
- A drill and a Tap and Die set (well, 1/8" Pipe Tap)
Assembly |
||
Use Teflon tape on threaded connections (you may need more than one layer of tape). To connect smooth PVC joints, you must first clean the area with PVC cleaning solvent. Then put a thick layer of PVC glue on both parts and immediately slide them together. Hold firmly for a minute or so, and then *don't* put any pressure on the joint for 24 hours. I know it's tempting to fire the gun while the glue is still wet, but doing so is dangerous and will permanently weaken your new toy.
It's okay to put several pieces together if you're quick, but you must still let the glue "cure" before attempting to do anything else with it.
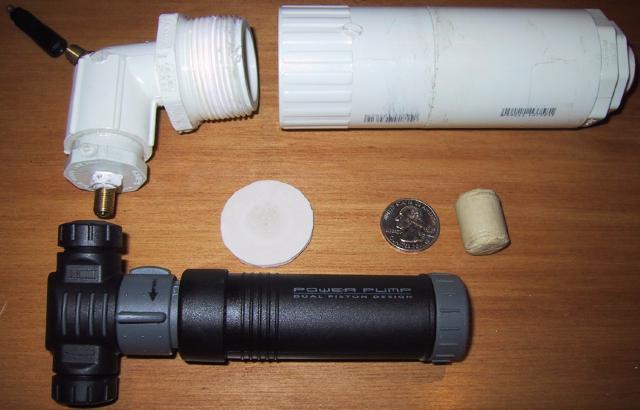
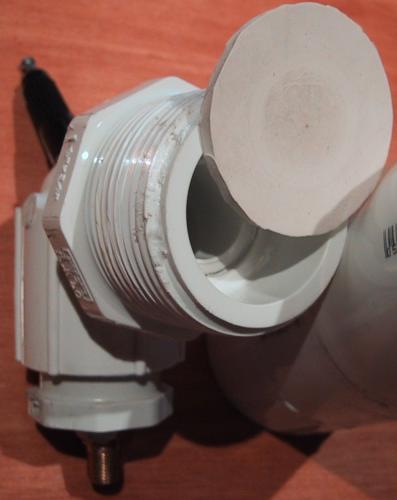
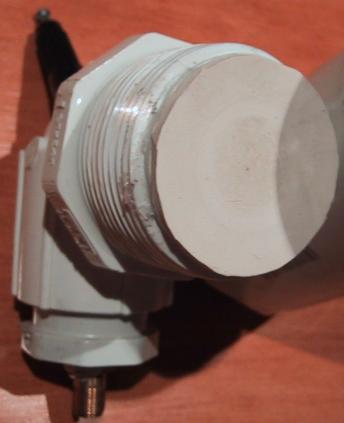
Here's the gun, taken apart as much as it can be:
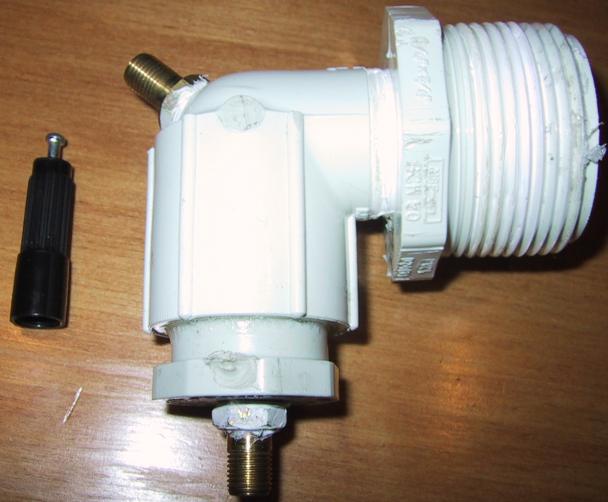
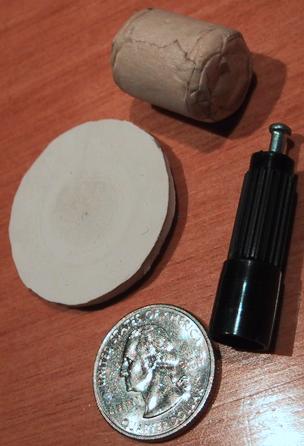
The elbow (with trigger) is built from:
- 2 tire valves
- 1 tire valve extender
- 1 elbow, with a smooth female connector and a threaded male connector.
- 1 male smooth cap
- 1 threaded male/female size adapter
Cut the end off the tire valve extender. It's easier to push this way.
Use a drill, and a tap and die set to put a hole in the male smooth cap, and thread the hole. Put one tire valve in this hole.
Using the same tools, put a hole in the corner of the elbow. This is somewhat difficult to get straight. Put the other tire valve in the hole. Put the tire valve extender on this tire valve.
Attach the elbow to the size adapter and the cap, then let the parts dry until tomorrow.
The main chamber:
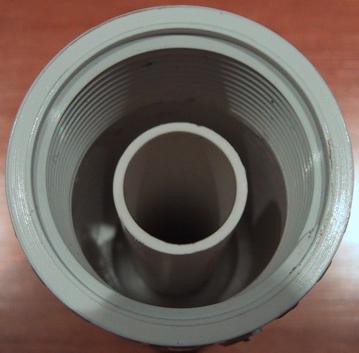
The main chamber is built from:
- 3" (or so) large PVC pipe (I used 1.25" width)
- 1 straight joint, female-threaded on one side, and female-smooth on the other.
- 1 straight joint, female-smooth on both sides.
- 2 size adapters (more or less, depending on sizes)
- 6" (or so) small PVC pipe (I used 0.5" width)
Using a dremel, or other similar tool, remove the inner lip of your smallest size adapter. You need the small PVC pipe to go all the way through, but the adapter is designed to stop the pipe. Sand the lip off and test to make sure the small pipe goes through.
Assemble the size adapters and put them into the smooth-smooth straight joint.
You may want to test these next two steps without glue to make sure your PVC is cut to the correct length.
Put the large PVC pipe into the other end of the straight joint.
Put the other end of the large PVC pipe into the smooth half of the smooth-threaded straight joint.
Decide how far back the barrel should reach inside the main chamber. Mine goes back about to the middle of the threads. The position of the barrel end will depend on how far you can screw in the elbow piece. It's probabably a good idea to assemble these parts (with diaphragm) and put the barrel in (without glue) to insure you have the right depth. Mark the front of the barrel with a marker, then pull it back out.
Once you know exactly how far in the barrel should go, glue it in. You may need to be *fast* to get it into the right position before the glue begins to dry. When I did this, I had about 3 seconds until the barrel was stuck in place. YMMV.
Wait overnight for all glued parts to dry.
You will need to cut yourself a rubber diaphragm sometime too.
This can be done at any time. I used a kitchen sink stopper,
but there are many other ways to make one.
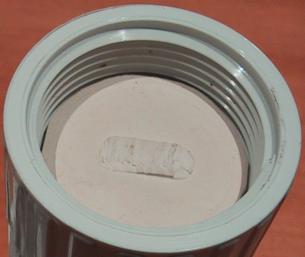
The diaphragm should be a stiff yet flexible sheet of rubber,
and just barely small enough to fit. It should fit inside the
threaded back end of the main chamber. There is a smooth ring
at the front of the elbow/trigger piece, and the diaphragm
should be big enough to completely cover this smooth ring.
Sand the ring until it is flat and smooth.
Place the smoothest side of the diaphragm against the barrel. Screw the elbow/trigger piece into the main chamber.
Put the bike pump on the extra tire valve, and tighten it on.
You should be ready to find some ammo and do some test shots.
It will take some testing to find the ideal amount to screw the front and back pieces together. This will affect the pressure on the diaphragm, which affects your effective psi range. You probably want the diaphragm to just barely touch the barrel.
The diaphragm material will also affect your effective pressure range. Flimsy materials work great at low pressures, but will "blow out" at high pressures. That means it gets sucked so far into the back chamber that it gets stuck.
For high pressures, use a stiffer diaphragm. For pressures above 60 or 80 psi, you'll probably want to use a solid piston instead of a diaphragm. Information on this is available on many other spudgun sites.
Test Results |
||
One other thing I've noticed is that this gun has extremely low air volume. The size of the bullet matters much more than with bigger guns, so it has trouble firing things which are slightly smaller than the barrel. At high pressures, it still can, but not nearly as well as objects which fit snugly.